
How to Set Up a Router for a Large House or Apartment. Eliminate Dead Zones Completely Using These 5 Pro Level Techniques for Free.
Alright, let’s be real. There’s nothing quite like the sheer frustration of having a big, beautiful home or a spacious apartment, only to find yourself constantly battling those infuriating Wi-Fi dead zones. You know the drill: streaming a movie only for it to buffer endlessly in the bedroom, trying to take a video call from the study and dropping out mid-sentence, or just having a terrible signal in your favorite reading nook. It's enough to make you pull your hair out!
But what if I told you that banishing those connectivity black holes doesn’t have to cost you an arm and a leg? You don't always need to shell out big bucks for fancy new gear. Often, a few clever tweaks and a bit of know-how are all it takes. Today, we're going to dive deep into some pro-level techniques that can completely transform your home's Wi-Fi coverage, all without spending a single dime. Seriously, stick with me on this one!
The Core Problem: Why Big Spaces Struggle with Wi-Fi
Before we jump into solutions, it’s worth a quick chat about *why* these dead zones crop up in the first place. Wi-Fi signals, bless their hearts, are essentially radio waves. Just like sound waves, they hate obstacles. Walls, floors, furniture, even water pipes – they all work to absorb, reflect, or just plain block those precious signals.
The further you get from your router, the weaker the signal becomes. Add in multiple floors, thick concrete, or a myriad of smart home devices all vying for bandwidth, and you’ve got a recipe for a Wi-Fi nightmare. It's a classic case of physics, and understanding that is our first step to winning the battle.
Get Ready: Essential First Steps Before You Begin
Before we dive into the nitty-gritty, let's make sure your current setup is even remotely ready for optimization. Think of these as your basic warm-up exercises.
- Check Your Internet Plan: Is your internet speed truly sufficient for your household's needs? Sometimes, the problem isn't your Wi-Fi coverage but simply an inadequate broadband plan.
- Router Firmware Update: This is a big one, and often overlooked. Firmware is essentially the operating system for your router. Keeping it up-to-date can dramatically improve performance, security, and stability. Most routers have an option in their admin panel to check for and install updates. Don't skip this!
- A Quick Reboot: Seriously, sometimes all it takes is unplugging your router for 30 seconds and plugging it back in. It's like giving your tech a refreshing nap.
Unleashing the Power: 5 Pro-Level Techniques to Conquer Dead Zones (For Free!)
Alright, grab a cup of coffee. This is where we get down to business. These techniques are game-changers, and the best part is they won’t cost you a penny.
1. Strategic Router Placement: Location, Location, Location!
You’ve heard it in real estate, and it applies just as much to your Wi-Fi. The physical location of your router is perhaps the single most impactful factor you can control. A lot of folks just plop their router wherever the internet cable comes into the house, but that's often a recipe for disaster in larger spaces.
Think of your router as a lightbulb. You want its light (signal) to spread evenly throughout your home. Here’s how to pick the sweet spot:
- Go Central: The absolute best place for your router is as close to the geographical center of your home as possible. This ensures the signal has the shortest distance to travel to all corners.
- Elevate It: Get your router off the floor. Wi-Fi signals tend to travel downwards. Placing it on a shelf, on top of a cabinet, or even mounting it high on a wall helps project the signal outwards and downwards, covering more ground.
- Avoid Obstacles: Keep your router away from large metal objects (appliances, filing cabinets), thick concrete walls, water tanks, and even fish tanks. These are all signal killers. Microwaves, cordless phones, and even baby monitors can also interfere, so give your router some breathing room.
- Line of Sight: If you can see your router from various parts of your house, chances are your devices can "see" it too, meaning a stronger, more reliable connection.
2. Optimize Your Router’s Settings: Dive into the Digital Brains
Your router isn't just a signal broadcaster; it's a mini-computer with a ton of settings you can tweak. Logging into its administrative interface (usually by typing 192.168.1.1 or 192.168.0.1 into your browser) opens up a world of possibilities.
- Channel Optimization: Wi-Fi networks operate on channels. If your neighbors are using the same channel, it's like everyone trying to talk on the same radio frequency – lots of static and interference. Use a Wi-Fi analyzer app (many free ones available for smartphones) to find the least congested channels (usually 1, 6, or 11 for 2.4GHz, or various non-overlapping channels for 5GHz) and manually set your router to one of those. This can make a huge difference.
- Band Steering (if available): Many modern routers are dual-band (2.4GHz and 5GHz). The 2.4GHz band offers better range but slower speeds, while 5GHz is faster but has less range. Band steering tries to intelligently move devices to the best band. If your router has this feature, ensure it's enabled. If not, consider giving your 2.4GHz and 5GHz networks separate names (SSIDs) so you can manually connect devices to the optimal band.
- Quality of Service (QoS): Want to prioritize your streaming device over your kid's gaming console? QoS settings let you do just that. You can tell your router which devices or applications are most important, ensuring they get preferential treatment for bandwidth. This won't extend range, but it will make the signal you *do* have feel faster and more reliable for critical tasks.
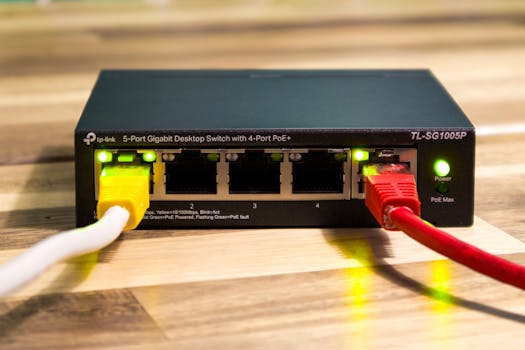
3. Repurpose an Old Router as an Access Point (AP)
Got an old router gathering dust in a closet? Don't toss it! That old piece of hardware can become a powerful Wi-Fi extender for absolutely zero cost. This is a brilliant hack for anyone looking to boost coverage. Instead of buying a new Wi-Fi extender, you can convert your old router into an Access Point (AP).
Here’s the gist:
- Disable DHCP: Log into your old router's settings and disable its DHCP server. This prevents IP address conflicts with your main router.
- Connect via LAN: Run an Ethernet cable from a LAN port on your main router to a LAN port (not the WAN/Internet port) on your old router.
- Same Network Name/Password (Optional): For seamless roaming, you can give your old router the same Wi-Fi network name (SSID) and password as your main router. Your devices will then automatically connect to the stronger signal as you move around.
This effectively creates a second Wi-Fi hotspot in another part of your house, extending your network's reach significantly. It's truly a free way to expand your network, using gear you already own.
4. Embrace the Power of Ethernet Backhaul (Where Possible)
Wi-Fi is convenient, no doubt, but nothing beats a good old-fashioned wired connection for speed and reliability. When you're dealing with a large space, leveraging Ethernet cabling can be a total game-changer, especially for connecting your repurposed access points.
If you can run an Ethernet cable from your main router to another room where you've placed your old router (now acting as an AP), you've created what's called an "Ethernet backhaul." This ensures the connection between your main network and the extended network is rock-solid, delivering full speeds to your remote Wi-Fi hot spot without the signal degradation inherent in wireless extenders.
Even if you don't have existing wiring, a single long Ethernet cable can sometimes be run along baseboards or through less conspicuous areas, providing a robust backbone for your extended Wi-Fi. It's a bit of effort, but the performance payoff is immense and, again, relies on simple, relatively inexpensive (or free, if you already have spare cables) components.
5. Fine-Tune Antenna Orientation: The Subtle Art of Signal Shaping
This might sound a little bit like Wi-Fi voodoo, but trust me, it works. If your router has external antennas, how you orient them can have a noticeable impact on signal propagation. Most people just point them straight up. That’s not always the best strategy for multi-story homes.
Try this: For a two-story house, point one antenna horizontally and the other vertically. The vertical antenna helps spread the signal across the same floor, while the horizontal one is better at reaching different floors. Experiment with different angles. A slight tilt here or there can sometimes push that elusive signal into a stubborn dead zone. It costs nothing but a few seconds of your time!
Beyond the Basics: When to Consider Paid Solutions
While these free techniques can work wonders, it’s only fair to acknowledge that sometimes, especially in truly massive homes or those with extremely challenging layouts (think old houses with thick plaster walls), you might hit a ceiling. When you've squeezed every last drop of performance from the free options, then it might be time to think about investing.
Mesh Wi-Fi systems are fantastic for large homes, creating a unified network with multiple access points. Powerline adapters can use your home’s electrical wiring to transmit network data. These are excellent options, but remember, the goal here was to show you what you can achieve for free first!
Your Wi-Fi Nirvana Awaits!
Conquering Wi-Fi dead zones in a large house or apartment doesn't have to be a costly ordeal. By strategically placing your router, tweaking its settings, repurposing old hardware, leveraging wired connections, and even adjusting your antennas, you can dramatically improve your home's connectivity without spending a dime.
Take these pro tips, apply them, and watch those frustrating dead zones vanish into thin air. You'll be streaming, working, and browsing seamlessly from every corner of your home. It's time to reclaim your digital freedom!
```